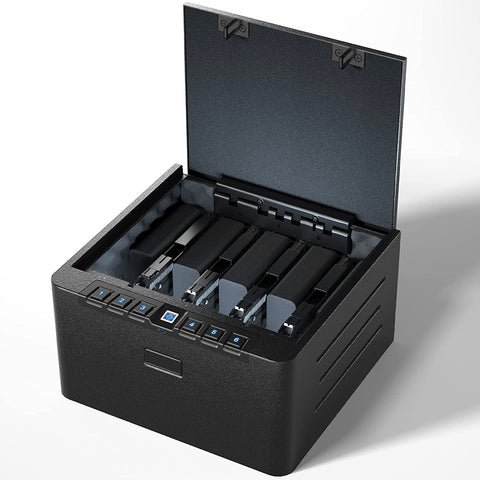
User Guidance User Guidance
HS100 (Electronic) Gun Safe - Manual HS100 (Electronic) Gun Safe - Manual
RE-USE Instructions
Important Safety Instructions
- DO NOT use rechargeable batteries or any other type of non-alkaline battery.
- DO NOT mix old and new batteries. DO NOT mix alkaline and standard batteries.
- After receiving the safe, please change the default code as soon as possible for better security.
- DO NOT lock the key inside safe.
- DO NOT leave the safe in extreme weather conditions. Battery power may be affected.
- DO NOT store loaded firearms in this unit. Firearms are serious in nature and must be treated with respect and stored responsibly.
Battery Installation

- Open the cover of the keyhole below the panel, insert the spare key into the keyhole to open the safe (see FIGURE A).
- Inside the safe, find the battery compartment (see FIGURE B).

- Open the battery box with the help of a screwdriver(not included), insert 4 AA alkaline batteries (not included) into the battery compartment. Please note the "+" and "-" symbols. The "-" end of the battery is pressed against the spring in the compartment.
- After installing the battery, use the screws to lock the battery cover.
- Now you can program the safe.
- Always use brand new AA alkaline batteries. Using other batteries may render the safe inoperable.
- When you close the lid completely, your XDeer® safe will be locked, do not leave the spare key inside the safe.
Tenant Code Programming
- When the door to the safe is unlocked, enter the tenant code you want to program (see FIGURE C).

- Then press (just press one time) the LOCK button and release, the screen will display "CLOSED " (see FIGURE D) and the tenant code is programmed successfully.

- Enter the tenant code and the screen will display "OPENED " (see FIGURE E) and the safe door will be opened, at which point the tenant code you just programmed is no longer valid.

- If you want to lock the safe door, just repeat step 1. and step 2.
- NOTE: If you enter the wrong code 4 times in a row, the safe keypad will be locked for 15 minutes.
*PROGRAMMING TIPS
- Your tenant code can be a minimum of 4 and a maximum of 6 digits.
- Two keys cannot be pressed simultaneously.
- Programming a new tenant code will overwrite your previous code.
Master Code Programming
Default password should be changed as soon as you first use it to prevent unauthorized access to your safe deposit safe, so it should be kept confidential.
- When the door of the safe is open, press the CLEAR button twice in a row and release it, the screen will show "PROG ".
- Wait for "PROG " disappears, enter the default code 011223, the screen will display "-NEW- ".
- After "-NEW- " disappears, enter the 6-digit master code you want to program.
- When you have finished entering it, the screen will display "AGAIEN ".
- After "AGAIEN " disappears, repeat enter the 6-digit master code you just programmed.
- The screen will display "-DONE- ", indicating that the master code has been programmed successfully.
- After "-DONE- " disappears, you can now test the new code. If you cannot unlock it, please reprogram it from step 1.
- NOTE1: After unlocking the safe using the master code, the tenant code that have been programmed will be deleted.
- NOTE2: If you enter the wrong code 4 times in a row, the safe keypad will be locked for 15 minutes.
*TIP: The screen displays "ERROR ", which means the master code has failed to be programmed, wait until the "ERROR " disappears, then start programming again from step 1.
Change Tenant Code (Special circumstances)
Before the next tenant uses the safe, if the safe is in a closed state (when the tenant's code is not known), the hotel manager can use the key to change the tenant's code.
- The safe in the closed state, insert the backup key and turn it to the right (keeping the key in place), open the safe.
- Enter the new tenant code (number of code digits: 4 to 6) and press the LOCK button once;
- The backup key will automatically reset while the safe is locked.
- Pull out the backup key, the new tenant code is successfully changed.
- Finally, the hotel manager uses the new tenant code just reset to unlock the safe so that it stays open and the next tenant can use it normally.
Change the Working Mode
After the backup key unlocks the safe (in the state that the safe door is not locked), press the CLEAR button twice in a row quickly, the display will show "PROG " (indicating that it officially enters the program), wait until "PROG " disappears, then use the numeric.
After "PROG " disappears, use the digital keypad to enter "751019" and wait until the screen disappears.
Enter "171100" to switch to personal mode (or "171101" to switch to hotel mode).
After inputting, press the LOCK button three times continuously to switch the mode successfully.
- NOTE: The default factory mode of the safe is hotel mode.
Sound ON/OFF
Sound ON: The sequence of pressing the keypad is as follows: Press the "CLEAR" → "6 " → "6" → "LOCK", the sound is ON.
Sound OFF: Repeat the previous step, the sound is OFF.
Hide Code Display (Entering + Programming the Code)
Entering the code
This function is only used before entering a code, and cannot be used when programming a code. It can be used when it is not desired to show the entered code on the display.
- Press (and only press then realease) the CLEAR button to activate the system fade function, after which all entered digits are displayed as "-" (see FIGURE F).
- If no operation is performed on the safe within 10 seconds, the function will also be automatically disabled.
- NOTE 1: After one input operation, the system display function is restored.
- NOTE 2: If you want the system to enter the canceling function again, just press the "CLEAR" button before entering the code.
- NOTE 3: Pressing the LOCK button cancels the hide code display function and the screen will return to display.
Programming the code
This function is only used programming a code, and cannot be used when entering a code. It can be used when it is not desired to show the entered code on the display.
After closing the door after programming the code, the display will show the code just entered after the display shows "CLOSED ".
If you do not want to display the code, you can press (only once) the CLEAR button before entering the code to open the hidden code.
Backup Keys Access
The keyhole is located on the top of the safe. Two backup keys are provided. In the event these are needed to open the XDeer® Safe, simply insert one of the backup keys, and turn the key to open the safe.
Battery Power Detection
Detect whether the battery power installed in the safe needs to be replaced, in the case of no constant light on the screen, just press (only press) the LOCK button.
The screen shows "BA-H", indicating that the battery voltage is normal.
The screen shows "BA-L ", that the battery voltage is low, you need to replace the battery as soon as possible.
Power Saving Mode
The keyboard does not have any operation, while the screen is not always lit, this is the system will automatically enter the power saving mode.
*Internal LED
In order to save the loss of battery power in the safe, the internal LED will only light up when using the master code to unlock, and the USB or CEU connected to the power supply can not make the internal LED light always on.
Securing Your Safe
Using the Mounting Screws
- Fix the safe in the place which is not easy to move.
- Drill holes for expansion screws in the right place.
- Turn the expansion screws counter clockwise to separate.
- Use the expansion screws to secure the safe to the platform.
- Make sure the safe is mounted in place as required and then tighten all screws.
- NOTE1: Use the expansion screws when there is a concrete platform surface.
- NOTE2:Use the clamping screws when there is a wooden platform surface.
Using the Emergency Port
When USB emergency port connected to the power source, it can assist you to unlock by keypad.
- The interface type belongs to USB Mini (see FIGURE G).
- Spare keys can not be found, no battery or battery power in the safe is insufficient, you can use the USB emergency interface.
- Power devices that can be energized are mobile power, car power or home power.
- NOTE: The package not included the USB cable.
Error Message Indication
When the following message appears on the display, it indicates an error condition.
Please follow the instructions below.
- -ERROR - Indicates the code operation error, need to re-enter the code correctly.
- -ERROR1 - Indicates that the door cannot be opened properly and the latch is stuck. Please push the door panel firmly. So that the latch head is loosened, and then re-open the door operation.
- -ERROR2 - Indicates that the door cannot be closed properly and the latch may be stuck. Please push the door panel firmly. Please push the door panel to loosen the latch head, and then reopen the door.
*More Requirements
This manual 1.0 default is hotel mode. It also has features related to hotel mode and personal mode for you to use in special scenarios with special needs.
*More Functions of the Personal Mode
If you need to develop more functions of the personal mode of the safe, please contact to XDeer® customer support team (xdeersafe@hotmail.com) get the manual 2.0.
*CEU Can Assist with Safes in Hotel Mode.
If you order more than 200 safes, we will give you a CEU and its manual, CEU can read 100-access-data of the safes to help you manage them. Also, it can be used as an emergency power supply to unlock the safe. Please contact to XDeer® customer support team if you need it.
RE-USE Instructions
Important Safety Instructions
- DO NOT use rechargeable batteries or any other type of non-alkaline battery.
- DO NOT mix old and new batteries. DO NOT mix alkaline and standard batteries.
- After receiving the safe, please change the default code as soon as possible for better security.
- DO NOT lock the key inside safe.
- DO NOT leave the safe in extreme weather conditions. Battery power may be affected.
- DO NOT store loaded firearms in this unit. Firearms are serious in nature and must be treated with respect and stored responsibly.
Battery Installation

- Open the cover of the keyhole below the panel, insert the spare key into the keyhole to open the safe (see FIGURE A).
- Inside the safe, find the battery compartment (see FIGURE B).

- Open the battery box with the help of a screwdriver(not included), insert 4 AA alkaline batteries (not included) into the battery compartment. Please note the "+" and "-" symbols. The "-" end of the battery is pressed against the spring in the compartment.
- After installing the battery, use the screws to lock the battery cover.
- Now you can program the safe.
- Always use brand new AA alkaline batteries. Using other batteries may render the safe inoperable.
- When you close the lid completely, your XDeer® safe will be locked, do not leave the spare key inside the safe.
Tenant Code Programming
- When the door to the safe is unlocked, enter the tenant code you want to program (see FIGURE C).

- Then press (just press one time) the LOCK button and release, the screen will display "CLOSED " (see FIGURE D) and the tenant code is programmed successfully.

- Enter the tenant code and the screen will display "OPENED " (see FIGURE E) and the safe door will be opened, at which point the tenant code you just programmed is no longer valid.

- If you want to lock the safe door, just repeat step 1. and step 2.
- NOTE: If you enter the wrong code 4 times in a row, the safe keypad will be locked for 15 minutes.
*PROGRAMMING TIPS
- Your tenant code can be a minimum of 4 and a maximum of 6 digits.
- Two keys cannot be pressed simultaneously.
- Programming a new tenant code will overwrite your previous code.
Master Code Programming
Default password should be changed as soon as you first use it to prevent unauthorized access to your safe deposit safe, so it should be kept confidential.
- When the door of the safe is open, press the CLEAR button twice in a row and release it, the screen will show "PROG ".
- Wait for "PROG " disappears, enter the default code 011223, the screen will display "-NEW- ".
- After "-NEW- " disappears, enter the 6-digit master code you want to program.
- When you have finished entering it, the screen will display "AGAIEN ".
- After "AGAIEN " disappears, repeat enter the 6-digit master code you just programmed.
- The screen will display "-DONE- ", indicating that the master code has been programmed successfully.
- After "-DONE- " disappears, you can now test the new code. If you cannot unlock it, please reprogram it from step 1.
- NOTE1: After unlocking the safe using the master code, the tenant code that have been programmed will be deleted.
- NOTE2: If you enter the wrong code 4 times in a row, the safe keypad will be locked for 15 minutes.
*TIP: The screen displays "ERROR ", which means the master code has failed to be programmed, wait until the "ERROR " disappears, then start programming again from step 1.
Change Tenant Code (Special circumstances)
Before the next tenant uses the safe, if the safe is in a closed state (when the tenant's code is not known), the hotel manager can use the key to change the tenant's code.
- The safe in the closed state, insert the backup key and turn it to the right (keeping the key in place), open the safe.
- Enter the new tenant code (number of code digits: 4 to 6) and press the LOCK button once;
- The backup key will automatically reset while the safe is locked.
- Pull out the backup key, the new tenant code is successfully changed.
- Finally, the hotel manager uses the new tenant code just reset to unlock the safe so that it stays open and the next tenant can use it normally.
Change the Working Mode
After the backup key unlocks the safe (in the state that the safe door is not locked), press the CLEAR button twice in a row quickly, the display will show "PROG " (indicating that it officially enters the program), wait until "PROG " disappears, then use the numeric.
After "PROG " disappears, use the digital keypad to enter "751019" and wait until the screen disappears.
Enter "171100" to switch to personal mode (or "171101" to switch to hotel mode).
After inputting, press the LOCK button three times continuously to switch the mode successfully.
- NOTE: The default factory mode of the safe is hotel mode.
Sound ON/OFF
Sound ON: The sequence of pressing the keypad is as follows: Press the "CLEAR" → "6 " → "6" → "LOCK", the sound is ON.
Sound OFF: Repeat the previous step, the sound is OFF.
Hide Code Display (Entering + Programming the Code)
Entering the code
This function is only used before entering a code, and cannot be used when programming a code. It can be used when it is not desired to show the entered code on the display.
- Press (and only press then realease) the CLEAR button to activate the system fade function, after which all entered digits are displayed as "-" (see FIGURE F).
- If no operation is performed on the safe within 10 seconds, the function will also be automatically disabled.
- NOTE 1: After one input operation, the system display function is restored.
- NOTE 2: If you want the system to enter the canceling function again, just press the "CLEAR" button before entering the code.
- NOTE 3: Pressing the LOCK button cancels the hide code display function and the screen will return to display.
Programming the code
This function is only used programming a code, and cannot be used when entering a code. It can be used when it is not desired to show the entered code on the display.
After closing the door after programming the code, the display will show the code just entered after the display shows "CLOSED ".
If you do not want to display the code, you can press (only once) the CLEAR button before entering the code to open the hidden code.
Backup Keys Access
The keyhole is located on the top of the safe. Two backup keys are provided. In the event these are needed to open the XDeer® Safe, simply insert one of the backup keys, and turn the key to open the safe.
Battery Power Detection
Detect whether the battery power installed in the safe needs to be replaced, in the case of no constant light on the screen, just press (only press) the LOCK button.
The screen shows "BA-H", indicating that the battery voltage is normal.
The screen shows "BA-L ", that the battery voltage is low, you need to replace the battery as soon as possible.
Power Saving Mode
The keyboard does not have any operation, while the screen is not always lit, this is the system will automatically enter the power saving mode.
*Internal LED
In order to save the loss of battery power in the safe, the internal LED will only light up when using the master code to unlock, and the USB or CEU connected to the power supply can not make the internal LED light always on.
Securing Your Safe
Using the Mounting Screws
- Fix the safe in the place which is not easy to move.
- Drill holes for expansion screws in the right place.
- Turn the expansion screws counter clockwise to separate.
- Use the expansion screws to secure the safe to the platform.
- Make sure the safe is mounted in place as required and then tighten all screws.
- NOTE1: Use the expansion screws when there is a concrete platform surface.
- NOTE2:Use the clamping screws when there is a wooden platform surface.
Using the Emergency Port
When USB emergency port connected to the power source, it can assist you to unlock by keypad.
- The interface type belongs to USB Mini (see FIGURE G).
- Spare keys can not be found, no battery or battery power in the safe is insufficient, you can use the USB emergency interface.
- Power devices that can be energized are mobile power, car power or home power.
- NOTE: The package not included the USB cable.
Error Message Indication
When the following message appears on the display, it indicates an error condition.
Please follow the instructions below.
- -ERROR - Indicates the code operation error, need to re-enter the code correctly.
- -ERROR1 - Indicates that the door cannot be opened properly and the latch is stuck. Please push the door panel firmly. So that the latch head is loosened, and then re-open the door operation.
- -ERROR2 - Indicates that the door cannot be closed properly and the latch may be stuck. Please push the door panel firmly. Please push the door panel to loosen the latch head, and then reopen the door.
*More Requirements
This manual 1.0 default is hotel mode. It also has features related to hotel mode and personal mode for you to use in special scenarios with special needs.
*More Functions of the Personal Mode
If you need to develop more functions of the personal mode of the safe, please contact to XDeer® customer support team (xdeersafe@hotmail.com) get the manual 2.0.
*CEU Can Assist with Safes in Hotel Mode.
If you order more than 200 safes, we will give you a CEU and its manual, CEU can read 100-access-data of the safes to help you manage them. Also, it can be used as an emergency power supply to unlock the safe. Please contact to XDeer® customer support team if you need it.


